


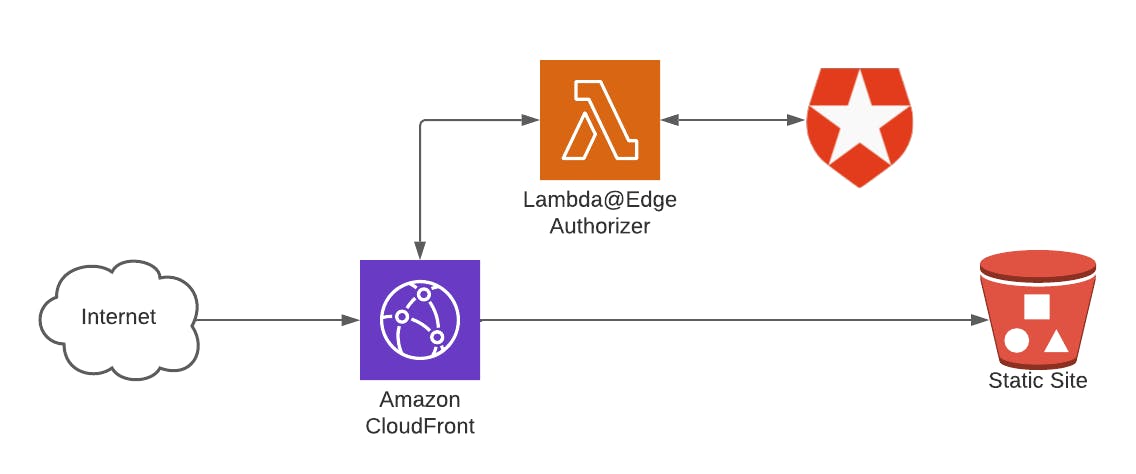
In this post, we'll use AWS CDK to deploy a static site to an S3 Bucket, distribute the site using CloudFront, and protect it with a CloudFront Lambda@Edge function that connects to Auth0. If the user isn't logged in, the Lambda@Edge function will redirect them to Auth0's login page... and the Lambda@Edge function will handle the necessary OAuth callbacks to eventually store the JWT as a cookie for the user.
You could follow the same approach for other authorization providers (OAuth or otherwise).
The architecture will look like this:
The code for this post is located here: github.com/martzcodes/blog-cdk-cloudfront-e..
Deploying a Static Site
To get started we need to create a bucket:
const bucket = new Bucket(this, "Bucket", {
  removalPolicy: RemovalPolicy.DESTROY,
  blockPublicAccess: BlockPublicAccess.BLOCK_ALL,
  objectOwnership: ObjectOwnership.BUCKET_OWNER_ENFORCED,
  autoDeleteObjects: true,
});
This creates an S3 Bucket that will be emptied (autoDeleteObjects) and removed (removalPolicy) when the CloudFormation stack is destroyed. It also prevents people from directly accessing the files (blockPublicAccess) and enforces proper IAM ownership of files within the bucket (objectOwnership).
Next, we want CDK to upload the files to the bucket after the bucket is created.
new BucketDeployment(this, "BucketDeployment", {
  destinationBucket: bucket,
  sources: [Source.asset(join(__dirname, "../dist"))],
});
To do this, we create an "asset" out of our static site's output folder (dist) so that it can be copied to the S3 Bucket as part of the deployment. Source.asset(...) grabs the folder and zips it up and uploads it to the CDK asset bucket deployment. CloudFormation will then copy that zip file using CDK's BucketDeployment construct.
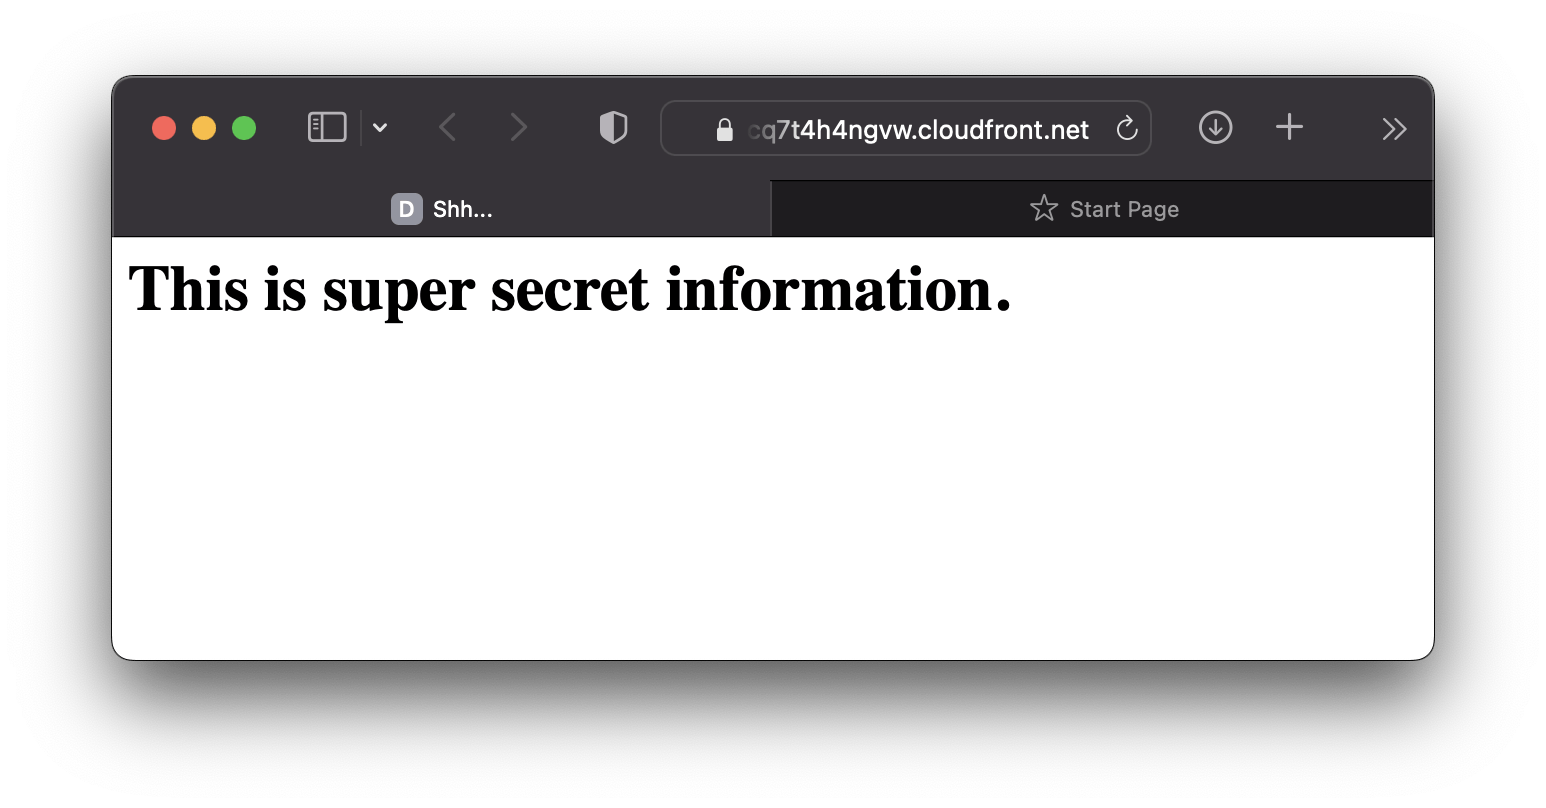
Our "dist" folder simply contains an index.html file with:
<html>
  <head>
    <title>Shh...</title>
  </head>
  <body>
    <h1>This is super secret information.</h1>
  </body>
</html>
The last step is to create the CloudFront Distribution:
const originAccessIdentity = new cloudfront.OriginAccessIdentity(
  this,
  "OriginAccessIdentity"
);
bucket.grantRead(originAccessIdentity);

const cloudFront = new cloudfront.Distribution(this, "Distribution", {
  defaultRootObject: "index.html",
  defaultBehavior: {
    origin: new S3Origin(bucket, { originAccessIdentity }),
  },
});

new CfnOutput(this, `CloudFrontUrl`, {
  value: `https://${cloudFront.distributionDomainName}`,
});
This grants CloudFront read-access to the S3 Bucket and tells it to use the index.html file as the root and serve up the files within the bucket. We also use a CfnOutput to export the resulting CloudFront URL that your page can be accessed at.
Outputs:
BlogCdkCloudfrontEdgeAuth0Stack.CloudFrontUrl = https://<your cloudfront distribution>.cloudfront.net
If we npx cdk deploy and load the page now we'll see our page, but it won't be protected.
Using Lambda@Edge to Authorize using Auth0
Lambda@Edge can be used similar to how Authorizer Lambdas can be used with API Gateway. When a request comes in to CloudFront, it will invoke the lambda if the cache is invalid. From there the lambda can do whatever it needs. In our case we want it to check for a cookie and if the cookie isn't present redirect to Auth0. We also need to handle the OAuth flow for the login callback and fetch the id_token to store it in the cookie.
This is an experimental part of the CloudFront CDK module and there's definitely some clunkiness to it. They have their own Lambda function construct called EdgeFunction. And unfortunately it doesn't support the auto-bundling that NodejsFunction does using esbuild. So, we'll need to bundle the lambda ourself before deploying.
We need to:
- Create the EdgeFunction
- Tell CloudFront to Use the EdgeFunction
- Store Auth0 Credentials in a SecretsManager Secret
Create the EdgeFunction
The EdgeFunction interface is essentially the same as the vanilla Lambda Function CDK construct.
const authFn = new cloudfront.experimental.EdgeFunction(
  this,
  `CloudFrontAuthFn`,
  {
    code: Code.fromAsset(join(__dirname, "./auth-lambda/")),
    handler: "index.handler",
    runtime: Runtime.NODEJS_16_X,
    logRetention: RetentionDays.ONE_DAY,
  }
);
Since this doesn't support auto-bundling like NodejsFunction we need to get a little creative with our build steps. We'll add two npm scripts to help support this. In package.json we'll add:
"scripts": {
  "deploy": "npm run esbuild && npm run cdk deploy -- -v",
  "esbuild": "esbuild ./lib/auth.ts --outfile=./lib/auth-lambda/index.js --bundle --platform=node --target=node16 --external:aws-sdk",
  ...
},
The esbuild script uses esbuild to bundle the auth function's code into javascript. From there CDK will load it up using the Code.fromAsset(... methods above, which take that directory and zip it up (which ends up in the lambda).
As for the authorizer function code... I'm not going to go in depth with the logic (it's pretty vanilla OAuth flow)...
export const handler = async (event: CloudFrontRequestEvent) => {
  const request = event.Records[0].cf.request;

  if (PUBLIC_PATHS.find((pattern) => pattern.test(request.uri))) {
    return request;
  }

  try {
    if (!auth0Creds) {
      const getSecret = new GetSecretValueCommand({
        SecretId,
      });
      const secret = await sm.send(getSecret);
      auth0Creds = JSON.parse(secret.SecretString!) as Auth0Creds;
    }
    const loggedIn = await loginCallback(request);
    if (loggedIn) {
      console.log("was login callback");
      return loggedIn;
    }
    const redirectToLogin = checkToken(request);
    if (redirectToLogin) {
      console.log("not logged in");
      return redirectToLogin;
    }

    console.log("authenticated!");
    return request;
  } catch (e) {
    console.log(e);
    return unauthorizedResponse;
  }
};
At a high level it does the following:
- Checks if the path is for a "public" / unauthenticated file (could be things like favicons / non-secret files / etc)
- If it's a file we care about: Get the Auth0 Credentials from SecretsManager (and use cached if available)
- Check if it was a login callback from Auth0. If it was... fetch the token with the code provided by Auth0 in the querystring
- If it wasn't a login callback... check to see if the token is already there in the cookie. If it was, validate it. If it wasn't: redirect to Auth0 login.
Tell CloudFront to Use the EdgeFunction
Now that we have the EdgeFunction created... we need to use it.
const cloudFront = new cloudfront.Distribution(this, "Distribution", {
  defaultRootObject: "index.html",
  defaultBehavior: {
    origin: new S3Origin(bucket, { originAccessIdentity }),
    cachePolicy: new CachePolicy(this, `CachePolicy`, {
      cookieBehavior: cloudfront.CacheCookieBehavior.all(),
      queryStringBehavior: CacheQueryStringBehavior.all(),
    }),
    edgeLambdas: [
      {
        functionVersion: authFn.currentVersion,
        eventType: cloudfront.LambdaEdgeEventType.VIEWER_REQUEST,
      },
    ],
  },
});
By providing the edgeLambda in the defaultBehavior section, all files will use the edge lambda. If we wanted to get more refined... CDK has an additionalBehaviors property that can be used. This would allow you to specify pathPatterns that require the EdgeFunction.
We also change the cachePolicy of the distribution. By default the EdgeFunction doesn't have access to the query string or cookie... and we need those to do the actual OAuth flow / verification.
Store Auth0 Credentials in a SecretsManager Secret
The last thing we need to do is the Auth0 setup and to store the credentials in SecretsManager. First we create a new application in Auth0 (Single Page Web App). Then we need to make two changes to the application.
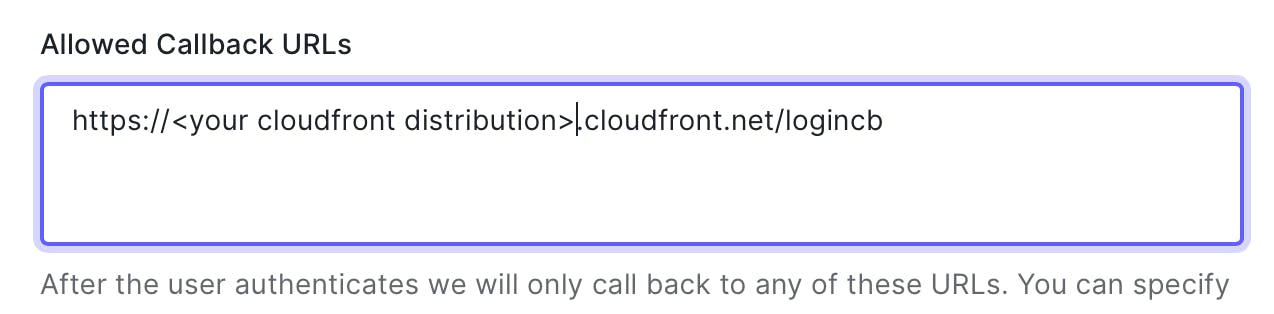
Add the login callback for your distribution so it's allowed:
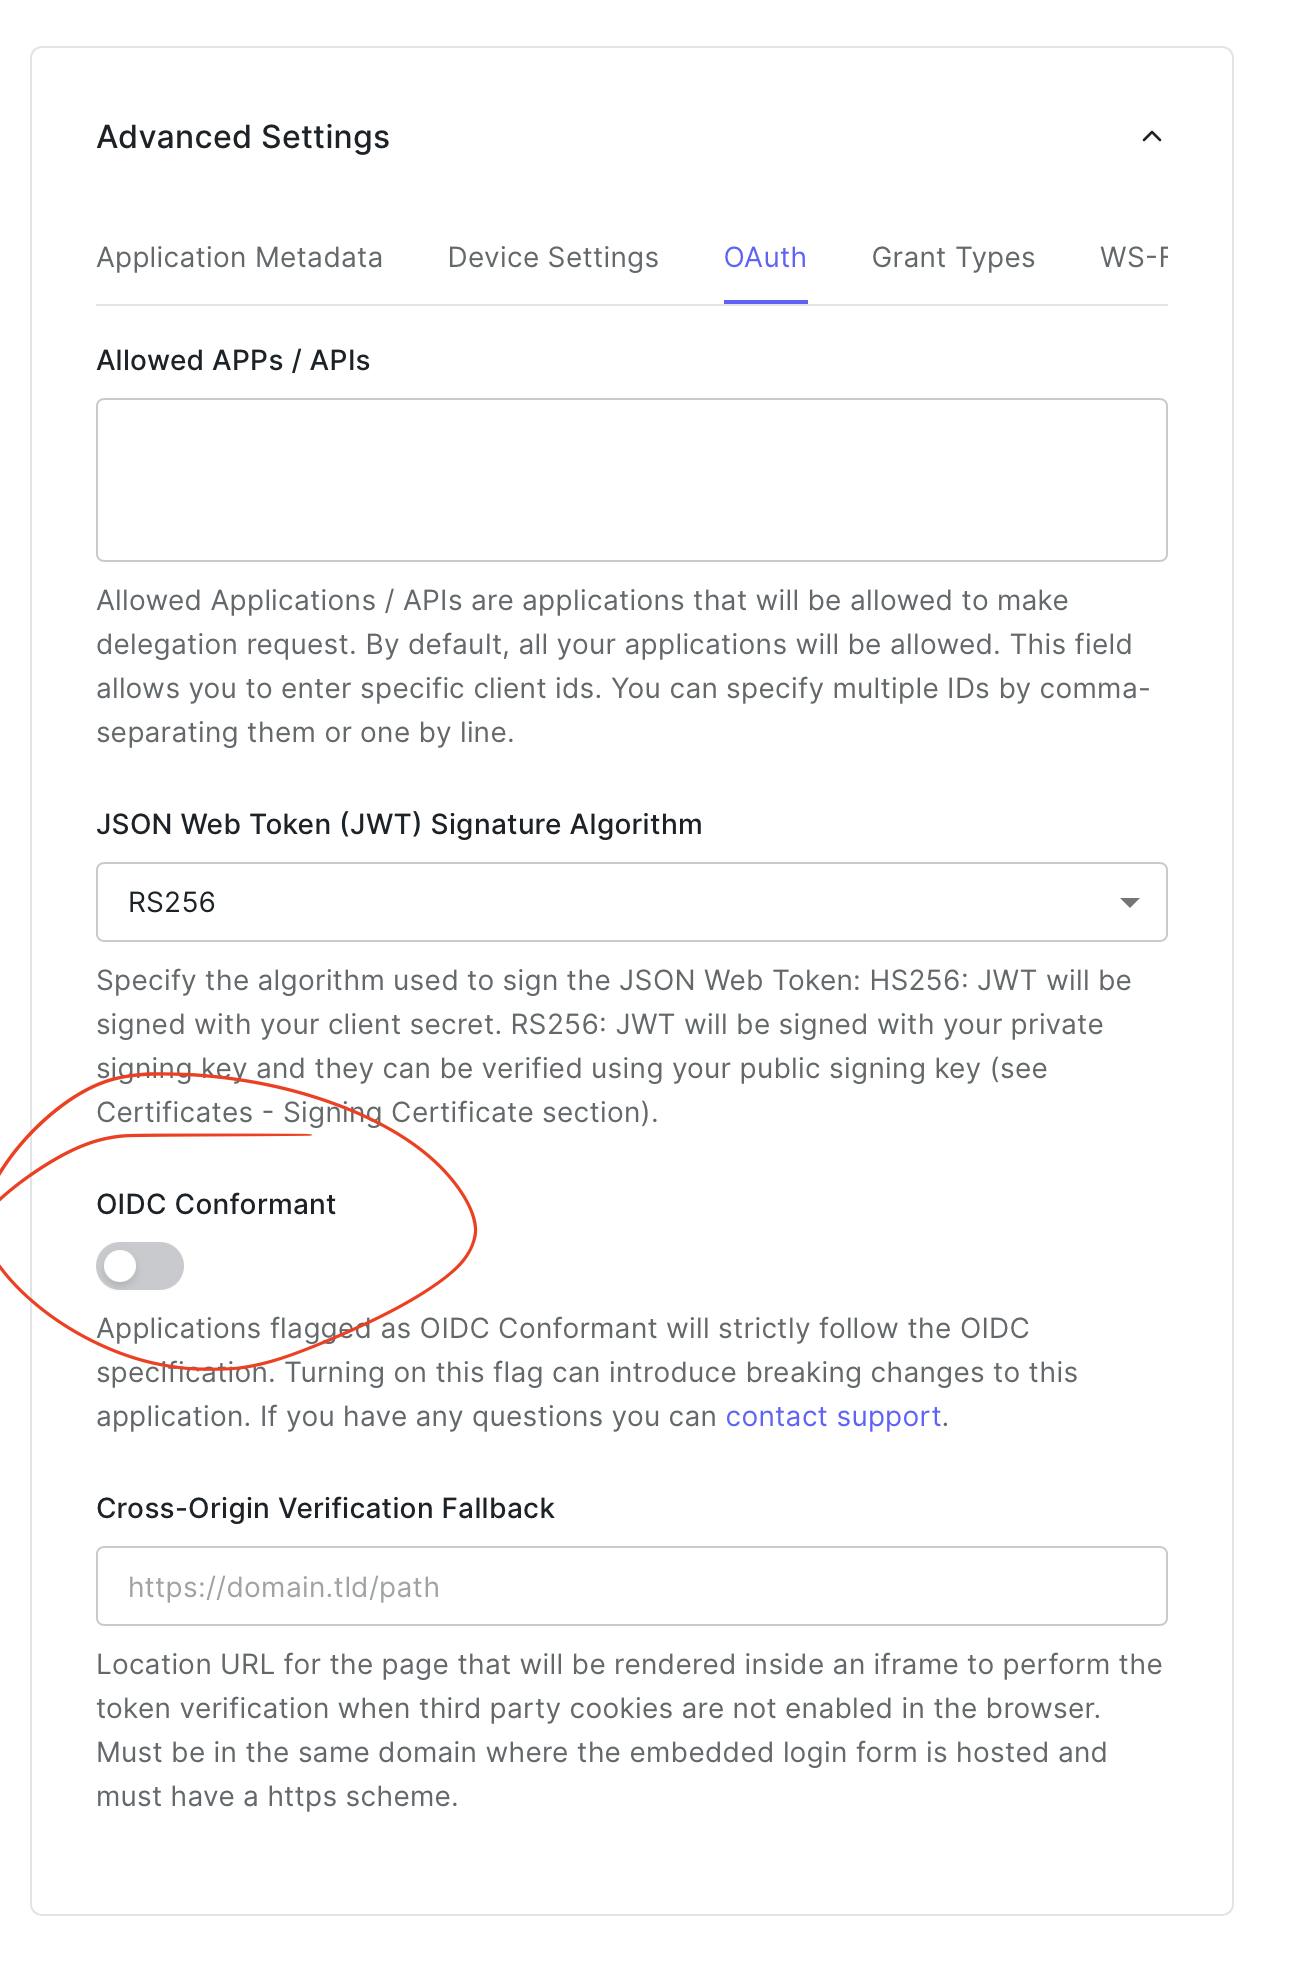
Turn off OIDC Conformance:
Then, grab the following information from your Auth0 Application and store it in a SecretsManager Secret:
{
  "certificate": "store the certificate from https://<your auth0>/pem",
  "AUTH0_CLIENT_ID": "your application's client id in auth0",
  "AUTH0_CLIENT_SECRET": "your application's client secret in auth0",
  "AUTH0_ALGORITHM": "RS256",
  "AUTH0_DOMAIN": "<your auth0 domain>",
  "AUTH0_HOST": "https://<your auth0 domain>",
  "AUTH0_LOGIN_URL": "https://<your auth0 domain>/login",
  "CALLBACK_PATH": "/logincb"
}
Finally, we import the secret to our CDK Stack and grant access for our Auth function to read it.
const secret = Secret.fromSecretNameV2(
  this,
  "Auth0Secret",
  "blog-cloudformation-edge/auth0"
);
secret.grantRead(authFn);
After deploying, you'll be re-directed to your Auth0 login page and after you log in, you'll be able to access your (now protected) static site!
Wrap Up
This is pretty neat! There are a lot of use cases for protecting the files from a CloudFront distribution and it doesn't have to be specific to Static Sites either. I'm going to use this to serve up an internal developer portal that showcases OpenAPI and AsyncAPI specs using eventcatalog.dev.
What would YOU use something like this for?